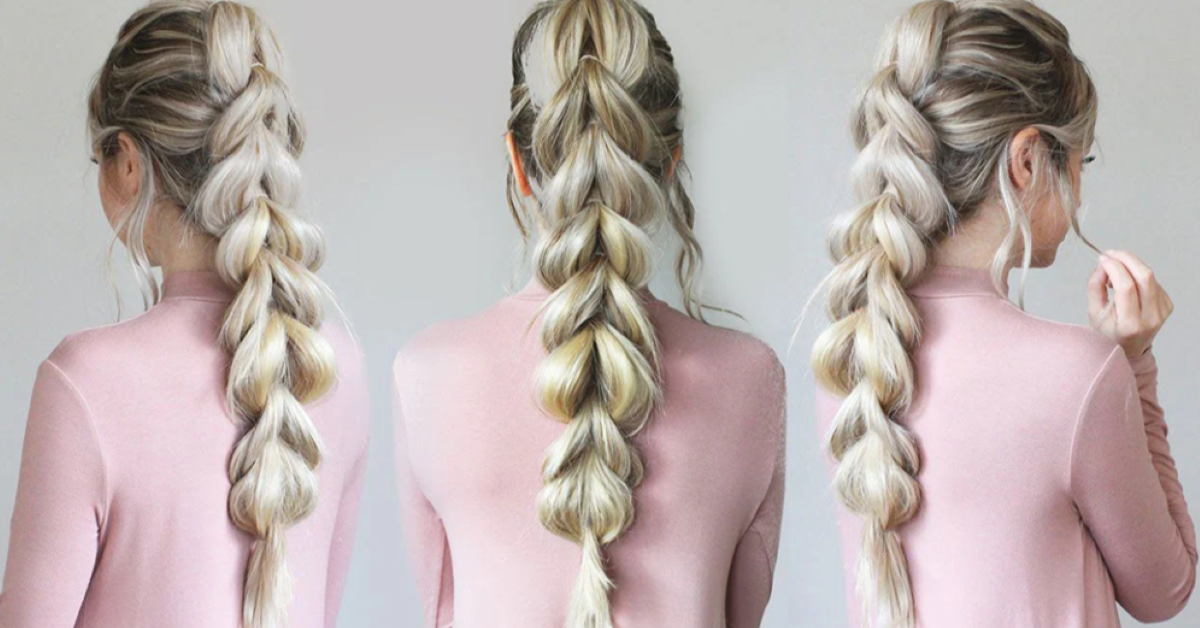
The pull-through braid has become a favourite hairstyle for its full, voluminous look and surprisingly simple technique. Unlike a traditional braid, this style is created with small ponytails and elastic bands, making it ideal for beginners and anyone seeking a polished, intricate finish with minimal effort. Whether you’re getting ready for work, a special occasion, or simply want to elevate your everyday hairstyle, this step-by-step guide will show you how to create a beautiful pull-through braid that stays in place all day.
What You’ll Need
- 8–10 clear elastics (amount depends on hair length)
- 1 large clip to hold sections out of the way
- 4–5 small wefts of clip-in extensions (four 1-clip wefts + one 2-clip weft works well). For the 1-clip wefts, clip each one onto itself to make it smaller so it fits neatly under each ponytail.
Optional: A 1-inch curling barrel to add soft curls to the face-framing pieces at the end
Step-by-Step Guide
- Gather the hair at the crown of your head into your first ponytail. Leave a few face-framing pieces out at the front if you like. Flip the ponytail up and out of the way, then clip a 1-clip weft upside down on the underside of this section. Gather everything back into the ponytail and secure with a clear elastic. Clip this ponytail up on top of your head.
- Starting just below your temples, gather a second section of hair below your first ponytail. Flip it up, clip two 1-clip wefts upside down on the underside for added fullness, then secure with a clear elastic. Clip this section up on top of your head as well.
- Unclip the first ponytail and split it down the middle into two equal sections. Drape one over each shoulder to keep them out of the way; these become part of your next section.
- Starting at about mid-ear level, gather your third section including the two split pieces from the first ponytail. Position it just below your second ponytail. Flip up, clip a 1-clip weft upside down underneath, and secure with an elastic. You’ll now see your first pull-through taking shape. Clip this section up on top of your head.
- Unclip the second ponytail and split it into two equal sections, placing them over each shoulder as before.
- For the next section, clip your 2-clip weft normally in the middle of where your next ponytail will sit; this adds extra volume and length. Gather all remaining hair (including the two split pieces from the second ponytail) and secure with an elastic. Clip up and out of the way.
- Continue repeating the pattern: split the previous ponytail into two, drape over shoulders, gather next section around them, clip in a weft, secure all the way down. Once your arms get tired, pull everything over your shoulder to continue more comfortably.
- Once you’ve reached the ends, secure everything with one final elastic.
- Starting at the top of the braid, use your index finger and thumb to gently tug the sides of each pull-through outward, making the braid look fuller and chunkier. Work in small sections; it’s easier to go bigger than to pull it back. Take your time here; this is what transforms the braid.
Optional: Use a 1-inch curling barrel to curl the face-framing pieces away from your face for a softer, more romantic finish.
With a little practice, the pull-through braid is a hairstyle that anyone can master. Its elegant, voluminous appearance makes it perfect for everything from casual outings to weddings and special occasions. Experiment with different variations, such as a half-up style, side braid or ponytail, and don’t be afraid to accessorise with ribbons, clips or flowers to make the look your own. The more you practise, the quicker and easier it becomes to create this eye-catching braid.